Hidden blue tooth software in win. XP and vista
Now you don't need 2 install any software for ur blutooth device.
you don't know but u already had it in ur window xp nd vista
it can b used as:-
1.open d run command
2.now typ 'fsquirt' without quotes
3.now just select weder u want 2 send or receive any file vry easy
Showing posts with label xp. Show all posts
Showing posts with label xp. Show all posts
Tuesday, August 19, 2008
Saturday, August 9, 2008
WINDOWS XP WILL BE CONTINUED
 It may lastly be preparatory to move down the accessibility ladder with computer producers (net books and the like out-of-the-way), but it seems like Microsoft is going to be footing by Windows XP for a good while yet, with it now promising to prop up the tried and true operating system through 2014. With relation to Microsoft higher-ranking VP Bill Veghte, that shore up will consist of security patches and "additional critical updates," and he adds that "customers who still require Windows XP will be proficient to get it," regardless of the plans to discontinue selling a retail product and bring to an end licensing it unswervingly to PC producers after June 30th. For those observing track, that'll indicate that Microsoft will be sustaining Windows XP for a full 13 years since its let go presumptuous it doesn't push out that shore up window for a second time when users repudiate to promote to Windows 7.
Friday, August 8, 2008
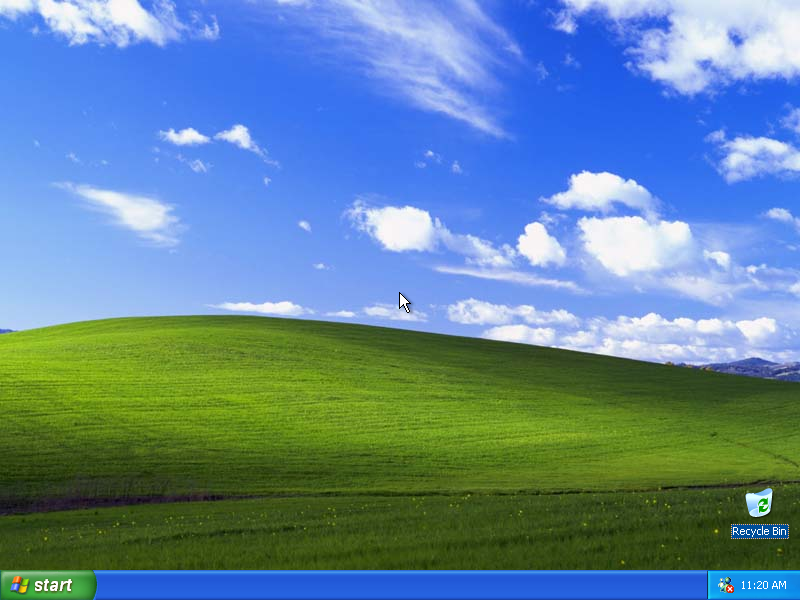
WAR BETWEEN XP AND VISTA- XP LOOKING GOOD
![[desktopdn8.jpg]](https://blogger.googleusercontent.com/img/b/R29vZ2xl/AVvXsEi8WJsDKOIk9hAu3IGwg_lXrvHpNKKO1pGPtyrqTJzYNWQrVml8aAGZo5noxjsyAJjUThs8Qkrz1d58gf99jJFG8r2RxHZwW2UpzJGUoeqgxLuYL2OiJb_G41omfEDH8gYZtrjcFTDtGPGx/s1600/desktopdn8.jpg)
With relation to a statement from Evans Data Corporation, only 8 percent of developers are budding software for Vista. Approximately half (49%) are mounting software for XP, and even Linux enlargement surpasses Vista's at 13%. Vista sustains to fail to formulate evolution in business environments; most are clinging with Windows XP. Even though the numbers say the other way, Vista's circumstances is not as awful as that it seems. Most software printed for XP will also run on Vista; the 2 operating systems are commonly compatible with each other. Hardware shore up for Vista has greatly enhanced since its liberate over a year ago, and now more or less all hardware unconfined over the past quite a few years should labor with it.
Thursday, August 7, 2008
Windows XP Hidden Applications
Yes, "hidden" applications! try them out and see what you have missed from Windows XP.
For each of these programs, launch it by: "Start" >> "Run", then type the executable name then press Enter.
Program: Clipboard Viewer (Access contents of Windows Clipboard)
Executable: clipbrd

Program: Dr. Watson for Windows (Trouble Shooting tool)
Executable: drwtsn32

Program: DirectX diagnosis (Diagnose DirectX, video & sound components)
Executable: dxdiag

Program: Private character editor (Create your own characters)
Executable: eudcedit

Program: Mcft Synchronization Manager (Synchronize network files to for off-line work)
Executable: mobsync

Program: Windows Media Player 5.1 (the basic version of Media Player)
Executable: mplay32

Program: System Monitor (A very useful tool to monitor PC performance)
Executable: perfmon

Program: File signature verification (Verify signature on files)
Executable: sigverif

Program: Account Database Security Tool (Warning! this tool might encrypt all user accounts)
Executable: syskey

Program: Built-in Windows Chat (Windows for Workgroups Chat)
Executable: winchat

For each of these programs, launch it by: "Start" >> "Run", then type the executable name then press Enter.
Program: Clipboard Viewer (Access contents of Windows Clipboard)
Executable: clipbrd
Program: Dr. Watson for Windows (Trouble Shooting tool)
Executable: drwtsn32
Program: DirectX diagnosis (Diagnose DirectX, video & sound components)
Executable: dxdiag
Program: Private character editor (Create your own characters)
Executable: eudcedit
Program: Mcft Synchronization Manager (Synchronize network files to for off-line work)
Executable: mobsync
Program: Windows Media Player 5.1 (the basic version of Media Player)
Executable: mplay32
Program: System Monitor (A very useful tool to monitor PC performance)
Executable: perfmon
Program: File signature verification (Verify signature on files)
Executable: sigverif
Program: Account Database Security Tool (Warning! this tool might encrypt all user accounts)
Executable: syskey
Program: Built-in Windows Chat (Windows for Workgroups Chat)
Executable: winchat
Thursday, July 31, 2008
Maximum windows xp tricks -the Best
Shortcut to restarting xp..
You can restart a Windows XP Pro and Home machine easily by creating a shortcut with following path.
(Assume you installed Windows XP on your C: Partition) "c:\windows\system32\shutdown.exe -r -f -t 00" -r is for restarting the computer. -f is to force close all programs without saving. -t 00 is used to restart in zero seconds. i.e. as soon as you D.
Click on the shortcut. You can log off from a Windows XP Professional or Home edition by running "C:\windows\system32\shutdown.exe -l -f -t 00". Also you can shutdown a Windows XP Home or Professional edition by running "c:\windows\system32\shutdown.exe -s -f -t 00". You always have to turn from the CPU after running this command. (Same with AT and ATX powered machines.)
If you want to turn down power of ATX machine automatically, run "c:\windows\system32\tsshutdn.exe 00 /POWERDOWN /DELAY:00" This is used to turn off a server. Even though your computer will be shutdown completely, this whole operation will take 30 seconds to finish.
Even though you don't have networked computers attached to your computer, this works.
1) Disabling Display of Drives in My Computer : This is yet another trick you can play on your geek friend. To disable the display of local or networked drives when you click My Computer go to : HKEY_CURRENT_USER\Software\Microsoft\Windows\Curre ntVersion\Policies\Explorer Now in the right pane create a new DWORD item and name it NoDrives. Now modify it's value and set it to 3FFFFFF (Hexadecimal) Now press F5 to refresh. When you click on My Computer, no drives will be shown. To enable display of drives in My Computer, simply delete this DWORD item. It's .reg file is as follows: REGEDIT4 [HKEY_CURRENT_USER\Software\Microsoft\Windows\Curre ntVersion\Policies\Explore r] "NoDrives"=dword:03ffffff
2) Pop a banner each time Windows Boots : To pop a banner which can contain any message you want to display just before a user is going to log on, go to the key: HKEY_LOCAL_MACHINE\SOFTWARE\Microsoft\Windows\Curr entVersion\WinLogon Now create a new string Value in the right pane named LegalNoticeCaption and enter the value that you want to see in the Menu Bar. Now create yet another new string value and name it: LegalNoticeText. Modify it and insert the message you want to display each time Windows boots. This can be effectively used to display the company's private policy each time the user logs on to his NT box. It's .reg file would be: REGEDIT4 [HKEY_LOCAL_MACHINE\SOFTWARE\Microsoft\Windows\Curr entVersion\Winlogon] "LegalNoticeCaption"="Caption here."
3) Great trick Lock ur PC yourself lock ur pc.. open notepad copy and paste the script below and save it .VBS extention This wil create a shortcut.. run(click) it set WshShell = WScript.CreateObject("WScript.Shell") set oShellLink = WshShell.CreateShortcut(wshShell.SpecialFolders("D esktop") & "\LockWorkstation.lnk") oShellLink.TargetPath = "%windir%\system32\rundll32.exe" oShellLink.Arguments = "user32.dll,LockWorkStation" oShellLink.Save
4) Deleting System Options from the Start menu : You can actually remove the Find and Run options from the start menu by performing a simple registry hack. Again like always Launch the registry editor and scroll down to the below key: HKEY_CURRENT_USER\Software\Microsoft\Windows\Curre ntVersion\Policies\Explorer Right-click on the right pane and select New, DWORD Value. Name it NoFind.(To remove the RUN option name it NoRun). Double-click the newly create DWORD to edit it's value and enter 1 as its value. This will disable the FIND option of the Start Menu and will also disable the default Shortcut key(F3 for Find.) To restore the Run or find command modify the value of the DWORD to 0 or simply Delete the DWORD value.
5) Cleaning Recent Docs Menu and the RUN MRU : The Recent Docs menu can be easily disabled by editing the Registry. To do this go to the following Key: HKEY_CURRENT_USER\Software\Microsoft\Windows\Curre ntVersion\Policies\Explorer Now in the right pane, create a new DWORD value by the name: NoRecentDocsMenu and set it's value to 1. Restart Explorer to save the changes. You can also clear the RUN MRU history. All the listings are stored in the key: HKEY_USERS\.Default\Software\Microsoft\Windows\Cur rentVersion\Explorer\RunMR U You can delete individual listings or the entire listing. To delete History of Find listings go to: HKEY_CURRENT_USER\Software\Microsoft\Windows\Curre ntVersion\Explorer\Doc Find Spec MRU and delete __________________
6) Can u Delete Recycle Bin? 1 thing is 4 sure, delete option can be added 2 recycle bin... the old registry thing will work out..... * launch d registry... * open HKEY_CLASSES_ROOT\CLSID\{645FF040-5081-101B-9F08-00AA002F954E}\ShellFolder * to add a rename and delete option, change the Dword attribute to 70 01 00 20 * refresh and reboot the system..... u r done. PS: always backup ur data as well as registry b4 attempting 2 work on it if u r a newbie....
7) To change the icons used for specific drives in explorer Open regedit by typing regedit into start->run then navigate to HKEY_LOCAL_MACHINE/SOFTWARE/Microsoft/Windows/CurrentVersion/Explorer now create a key(KEY not VALUE!!) called DriveIcons under Explorer... now within DriveIcons, create another key with the drive letter you want to change (e.g.,HKEY_LOCAL_MACHINE\SOFTWARE\Microsoft\Window s\CurrentVersion\Explorer\DriveIcons\K)... create another key within the drive letter key called DefaultIcon... now set the default String value equal to the icon you want to use. if you have a file that has more than one icon in it, such as a DLL file, use the standard C:\full_path\icon_file.dll,n
Cool Hacking windows SEND TO MENU I know this is a very simple thing but the problem, as like many other issues, is the ignorance about it. How often do you copy songs from a CD? Or some photos from a CD? What do you do? You select the required files and do a CTRL –C. Open the destination folder and do a CTRL-V. Here is something you can benefit time from. Customize your SEND TO MENU. This sounds simple and you can do it in less than sixty seconds.
You can create your own BASKET. First you’ll need access to hidden files. So change your view settings to make all hidden files visible. Tools -> folder options -> view (tab) and select the show hidden files and folders. go to parent drive:/documents and settings/(user name)/send to Open up my computer and locate your most used folders. Create a shortcut of the most used folders in SEND TO FOLDER.You can do this in a number of ways. Right click -> send to desktop(create shortcut) and move the shortcut from the desktop to the SEND TO FOLDER Copy the most used folder and go to SEND TO FOLDER and right click -> paste shortcut. Also remember to rename the shortcuts to send to videos or send to potos. We don’t need confusion when we use the same later. 5. DONE 9) How to remove the shortcut arrow from the desktop ? Open Regedit and navigate to the following key: HKEY_LOCAL_MACHINE \ SOFTWARE \ Microsoft \ Windows \ CurrentVersion \ Explorer \ Shell Icons Backup the key. More information. In the right-pane, create a new String value named "29" Double-click 29 and set its data to: C:\Windows\System32\shell32.dll,50 (an empty icon) Close Registry Editor. Now, Right-click Desktop, choose Properties Click the Appearance Tab. Click Advanced button. Choose Icon from the drop-down list Set it's size to 31 and press OK, OK. The changes will be applied now. Repeat the above steps and then set the Icon size back to 32 (defaults).
The above steps are required to force Windows to redraw the icons 10) The Complete list ! Can u Do it! Try to create a folder in Windows with either of these names-- "con" or "nul" or "Aux" or "Lpt1". Windows will not let u create .... This s coz these refer 2 some well known ports.... -con corresponds to the console -Lpt1 corresponds to printer and so on.... well dat was common but hw bt this ? Try these more CON, PRN, AUX, CLOCK$, NUL, COM1, COM2, COM3, COM4, COM5, COM6, COM7, COM8, COM9, LPT1, LPT2, LPT3, LPT4, LPT5, LPT6, LPT7, LPT8, and LPT9. TURN NUMLOCK ON AT LOGON.!! NumLock does not toggle on by default (system-wide), even if you have it set in your PC's BIOS, because of XP's multi-user functionality.
Guess Microsoft doesn't know everyone actually turns it on, which should be reason enough for what acts as "default"... Anyway, you can hack the Windows Registry to change this behavior, or run a script at logon to turn NumLock on. 1. To enable NumLock through the Registry: * Open Windows' Registry Editor (START > RUN, type "REGEDIT"). *. Navigate to HKEY_USERS\.Default\Control Panel\Keyboard. *. Change the value for InitialKeyboardIndicators from 0 to 2. 2.
To enable NumLock using a script, see this MS Knowledgebase article for complete instructions: CODEhttp://support.microsoft.com/directory/article.asp?ID=KB;EN-US;Q262625 Option 1 is the quicker method, but if you have more than one user on your system and one or more don't want NumLock on (stranger things have been known of), then option 2 is the way to go since it allows you to only attach the script to specific users. REMOVING SERVICES DEPENDENCIES.!! This will allow you to disable a service or uninstall it from your system without effecting another service that depends on it.
Here's how you do it
1. After you have set your services the way you want them and you have disabled/uninstalled something that another services depends on, run "regedit"
2. Under HKEY_LOCAL_MACHINE\System\find the service that will not function, do to another service being disabled/uninstall (found in ControlSet001\Services, ControlSet002\Services, and CurrentControlSet\Services)
3. Once you have found the service right-click on the string value, "DependOnService,"and modify
4. You should now see a list of services that it is dependent on. Simply delete the service that you have disabled/uninstalled 5. Restart your computer and your ready to go Disclaimer REMEMBER TO BACKUP YOU REGISTRY FIRST I'm not totaly sure if this will have any negative effects on your system. I used this method after uninstalling "Netbios over Tcpip" from my system completely, so that my Dhcp service would function and I have had NO negative effects on my system
Saturday, July 26, 2008
Build an XP SP3 Recovery Disc yourself

Steps 1-2
Step 1: Take Stock
To prepare a recovery CD, you'll need only three things: a Windows XP install CD (any edition), a valid Windows product key, and about 1.5 gigabytes of free space on your hard drive. Of course, as with many recipes, procuring the ingredients is often the hardest part.
The install CD can be any version, including Service Pack 2, Service Pack 1, or the original release from 2001. If you already have a disc labeled "Windows XP with Service Pack 3" (as opposed to merely an SP3 update disc), then you don't need this procedure.
The CD can be difficult to come by if you bought your PC with Windows preinstalled, mostly because so many manufacturers omit Microsoft's installer CD these days in favor of some sort of customized "express install" recovery disc. (This is done for a variety of reasons, including to simplify customer support and also, in the penny-pinching tradition, to reduce Microsoft licensing fees.) Some PC manufacturers are service-conscious enough to send a true XP CD to any customer who asks for one, but if you're not so lucky, you can get a genuine disc on eBay for as little as $10.
The 25-digit key, of course, you should already have handy if you own a legal license to the software. If XP came with your PC, it's printed on a sticker somewhere on the PC case; if you bought XP, it's on a sticker on the CD sleeve. (You may also have been compulsive enough to save the hologram-laden Certificate of Authenticity, which should have the key as well.) If you can't find it, contact your PC's manufacturer or, barring that, Microsoft for a proper key. You might also try the simply awesome (and awesomely named), open-source Magical Jelly Bean Key Finder, a tiny little utility whose sole purpose is to find the registration keys hidden away in your Registry.
Step 2: Slipstream Service Pack 3
To create a slipstreamed XP SP3 CD, first create a new folder called XP in the root folder of your hard drive. Insert your original XP CD, start Windows Explorer, and then navigate to your CD drive. Highlight everything in the root folder of the CD, and copy all of it to the C:\XP folder you just created.
Next, create a second new folder alongside C:\XP, and name it SP3. Go to download.microsoft.com, type sp3 network install into the search box, and click the link for Windows XP Service Pack 3 Network Installation Package for IT Professionals and Developers in the search results. Download the 324MB file, WindowsXP-KB936929-SP3-x86-ENU.exe, and save it to the new C:\SP3 folder.
From the Start menu, select Run (or press Windows key-R). Type the following command at the prompt and click OK:
c:\sp3\WindowsXP-KB936929-SP3-x86-ENU /integrate:c:\xp
Type the entire command on one line with only a single space between ENU and /integrate—there should be no spaces surrounding the colons.
If all goes well, the process should take a minute or two and then conclude with a simple "Completed" message box. Otherwise, if you see an error, here's what it means:
Failed to copy some or all of the files necessary for integrated install: This can happen for any number of reasons, most likely because you mistyped the /integrate command. But do make sure you have plenty of free hard drive space, and that all of the files from your older XP CD are present in the C:\XP folder.
…is not recognized as an internal or external command: Either you mistyped the SP3 update filename, or you didn't save it in the C:\SP3 folder.
…is not a valid Win32 application: This error usually means the file you downloaded is corrupt, or has not finished downloading. Delete the file and try downloading again.
…not the correct version: You're trying to slipstream the U.S. English version of the SP3 update with a non-English copy of Windows XP, or vice versa. Just return to the Microsoft download page, choose your language from the Change language list, and download the correct file.
Steps 3-4
Step 3: Automate the Install
Now if you want to be really slick, you can set up what Microsoft calls an answer file to enter your product key automatically so you don't have to type it manually later on. On your original Win XP CD (Professional Edition only), navigate to the \Support\Tools folder, double-click DEPLOY.CAB, and then double-click Setupmgr.exe to open the Windows Setup Manager Wizard. When prompted, choose Create a new answer file and then Windows Unattended Installation. For the User Interaction Level, choose Provide defaults, and when asked about the Distribution Folder, answer No. Finally, you'll see a new window, into which you can specify defaults; select Providing the Product Key on the left and then type your product key in the text fields on the right.
When you're done, save the file Unattend.txt into your C:\XP folder. For additional information, open the Setupmgr.chm file, also found in DEPLOY.CAB.
Step 4: Bootstrap and Burn
You're not done with your old XP disc yet; you still need to pull the boot loader off the old disc so you can make the new one bootable.
The easiest way to do this is using ImgBurn, available free from www.imgburn.com. Install ImgBurn, start the app, and click Write files/folders to disc on the first screen. Choose the Advanced tab, followed by the Bootable Disc tab, and from the Extract Boot Image list select the drive containing your XP disc. Click the Save icon and save the BootImage.ima file to your C:\SP3 folder.
Now it's time to burn a new CD. You'll need CD-burning software capable of creating a bootable CD, such as ImgBurn, Nero Burning ROM (part of Nero 8 Ultra Edition, or Roxio Media Creator, and you'll need to customize the burning settings carefully.
If you're using Roxio or Nero, choose Bootable CD or CD-ROM (Boot), respectively, from the list of project types. Or, if you're using ImgBurn, choose the Advanced tab, followed by the Bootable Disc tab, and turn on the Make Image Bootable option.
Next, use 0x7C0 for the load segment, and 4 for the sector count. Make sure you're using the
Drag the entire contents of the C:\XP folder into your CD project and burn the CD. For good measure, use a Sharpie pen to write your XP key right on your CD, and then put the disc in a safe place for that rainy day.
Subscribe to:
Posts (Atom)